Understanding Garlic Propagation: A Beginner’s Guide
Garlic, a culinary staple prized for its pungent flavor and numerous health benefits, is surprisingly easy to propagate. Unlike many plants, garlic doesn’t require seeds; instead, it reproduces through cloves, the individual segments within a garlic bulb. This process, known as vegetative propagation, allows gardeners to easily expand their garlic harvest year after year. This comprehensive guide will walk you through every step, from selecting the right bulbs to harvesting your homegrown garlic, ensuring a bountiful yield.
Choosing the Right Garlic Bulbs for Propagation
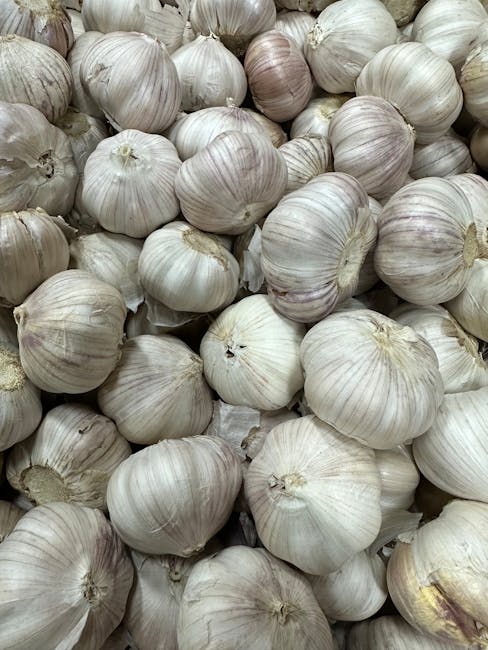
The success of your garlic propagation hinges on starting with high-quality bulbs. Avoid using garlic from the supermarket, as these are often treated to prevent sprouting. Opt for certified organic garlic bulbs, or bulbs from a reputable local source. Look for bulbs that are firm, plump, and free from disease or damage. Larger bulbs generally produce more cloves, increasing your yield. Consider the type of garlic as well; hardneck garlic produces scapes (flower stalks) and generally stores less well, but is more visually appealing and often has stronger flavor. Softneck garlic is known for its longer storage life, making it a preferred choice for many growers.
Preparing the Garlic Cloves for Planting
Before planting, carefully separate the garlic cloves from the bulb. Handle them gently to avoid damaging the cloves. Each clove contains a tiny plant embryo capable of growing into a new bulb. Discard any cloves that are soft, damaged, or show signs of disease. Examine the cloves carefully; a visible sprout is a good sign of viability, but it’s not strictly necessary for successful propagation.
Pre-planting Treatments (Optional but Beneficial):
- Soaking: Some gardeners soak the cloves in water for a few hours before planting to improve germination. This helps rehydrate the cloves and encourages faster sprouting.
- Scarification (for hard-coated cloves): Lightly nicking the base of the clove can help break the outer layer, making it easier for the sprout to emerge. Be careful not to damage the clove itself.
- Treatment with fungicide (optional): A preventative fungicide treatment can help protect against soil-borne diseases, particularly helpful in regions with high humidity or wet soil conditions. Follow the manufacturer’s instructions carefully.
Planting Your Garlic Cloves: Timing and Technique
The timing of garlic planting depends on your climate. Garlic is a cool-season crop that thrives in well-drained soil. Generally, the best time to plant garlic is in the fall, approximately 6-8 weeks before the first expected frost. This allows the cloves to establish a strong root system before winter. In warmer climates, you might plant in late winter or early spring.
Optimal Planting Depth and Spacing:
Plant the cloves 2-4 inches deep, with the pointed end facing upwards. Space the cloves 4-6 inches apart, allowing enough room for the bulbs to develop. Consider planting in rows for easier harvesting. Well-draining soil is essential; avoid areas prone to waterlogging. Amend heavy clay soils with compost or other organic matter to improve drainage and aeration.
Caring for Your Growing Garlic
Once planted, garlic requires minimal care. Water regularly, especially during dry periods, ensuring the soil remains consistently moist but not waterlogged. Mulching helps retain soil moisture, suppress weeds, and regulate soil temperature. Garlic does not require high amounts of fertilizer; a light application of compost or aged manure at planting time is generally sufficient. Avoid using nitrogen-rich fertilizers, as this can promote leafy growth at the expense of bulb development.
Pest and Disease Management:
Garlic is relatively resistant to pests and diseases, but occasional problems can arise. Common pests include nematodes and aphids. Monitor your plants regularly and take action if you notice any infestations. Natural pest control methods include using insecticidal soaps or introducing beneficial insects. Diseases such as white rot can be prevented by ensuring good soil drainage and crop rotation.
Harvesting Your Garlic
Garlic is ready for harvest when the leaves start to turn brown and dry, usually around 8-10 months after planting. This is typically late summer or early fall. Gently lift the bulbs from the soil using a garden fork or trowel. Allow the bulbs to cure in a well-ventilated, shaded area for 2-4 weeks. This allows the outer skins to dry and helps prevent spoilage. Once cured, trim the stems and roots, and store the bulbs in a cool, dry, and well-ventilated area.
Storing Garlic for Long-Term Use:
Proper storage is crucial for preserving the quality and flavor of your homegrown garlic. Store the garlic bulbs in a cool, dark, dry, and well-ventilated place. Braiding garlic is a traditional method that enhances air circulation and allows for extended storage. Avoid storing garlic in plastic bags, as this can trap moisture and lead to rotting. Properly cured and stored garlic can last for many months.
Troubleshooting Common Garlic Propagation Problems
Even with careful planning, you might encounter some challenges during garlic propagation. Here are some common problems and their solutions:
Problem: Poor Germination
Possible Causes: Planting too deep, planting at the wrong time of year, using damaged or diseased cloves, poor soil drainage.
Solutions: Ensure correct planting depth and timing. Select only healthy cloves, and improve soil drainage if necessary.
Problem: Small Bulbs
Possible Causes: Insufficient sunlight, lack of nutrients, overcrowding, pests or diseases.
Solutions: Provide adequate sunlight and amend the soil with compost or other organic matter. Ensure proper spacing between cloves. Control pests and diseases promptly.
Problem: Rotting Bulbs
Possible Causes: Poor drainage, excessive watering, fungal diseases.
Solutions: Improve soil drainage, avoid overwatering, and use a fungicide if necessary.
Beyond the Basics: Exploring Different Garlic Varieties and Techniques
The world of garlic is vast and varied, with numerous cultivars offering diverse flavors, sizes, and appearances. Experiment with different varieties to find your favorites. Consider trying different propagation methods, such as air-layering or bulbils, for a more advanced approach. Share your experiences with other gardeners and learn from their successes and challenges.
With a little planning and patience, you can enjoy a bountiful harvest of your homegrown garlic, savoring the satisfaction of cultivating this versatile and flavorful staple from clove to bulb.
